Showing posts with label recipes. Show all posts

Sunday, July 24, 2011

Sophisticated Chocolate Cake

Now this cake has class, don't you think?  :) I had promised my aunt to bring a cake to a dinner party she was planning, but my day turned out to be more hectic than I had expected, so I turned to something nice and easy - a simple, old fashioned chocolate cake.

The dough was a basic, one tier chocolate cake, with chocolate buttercream on top, but to spruce things up a little, I put a bit of mint into the cream, which really came through nicely. And last but not least, some quick and simple decorating can make a regular chocolate cake look a bit more glam - I melted some dark chocolate, spread it out on parchment paper, then drizzled a bit of melted white chocolate over it and let it set in the freezer. When it was completely set (I could use the time to get ready :) I just broke the chocolate into irregular pieces and stuck it on top of the chocolate mint buttercream.

The finished cake, half a minute before we ate it! I was really pleased with the results, since I put so little time into it.

Have you been baking anything recently? I've been experimenting with buckwheat... I'll let you know if I come up with something good!


xox,
Miss Diorista

Wednesday, July 6, 2011

How to Press Tofu

I've been experimenting with tofu for a few years, and I've come to quite like it. I'm not a vegetarian, but I still really enjoy vegetarian dishes, and tofu is no exception. I especially love to fry it (both in chunks and chopped up in stir-fry), as well as use it in smoothies (silk tofu, that is). However, in order to be able to fry it, you have to know how to press it first.

When serving fried tofu to some friends for dinner a few days ago, they asked me how I had cooked it. I noticed that when it came to pressing the tofu before frying, nobody knew how to do it. While quickly explaining it at the dinner table, I thought that I should probably do a short tutorial on this here, too - no one should be kept away from enjoying tofu because they don't know how to prep it for cooking, it's so simple to do!

1) Buy a block of tofu. If you are going to press and fry it, choose firm tofu. Lay a cloth on a dish, and the block of tofu on top of the cloth (you can wash the cloth afterwards, don't worry).
2) Wrap the cloth over and around the tofu, so it is completely covered.
3) Lay a plastic bag over the tofu and the cloth (this is for protection, see the next step).
4) Lay heavy books on top of the plastic bag - I usually use those two cooking books you see above.
Now leave this standing like this for about an hour. The heavy books will press the excess water out of the tofu, resulting in a sturdier block of tofu. If necessary, change the cloth after about half an hour, since the pressing won't be as effective if the cloth is already soaking wet.

After this, your tofu is ready to be used and cooked as you like! If you've never tried tofu before, I encourage you to try some, it's a great addition to a healthy diet.


Love,
Miss Diorista

Thursday, April 14, 2011

Suitable for any princess...

You can't go wrong with cupcakes! Don't you just love that dish? I got two of those for my birthday last year (which reminds me, my birthday this year is approaching incredibly fast! Yay!) and they are the perfect size for cuppies - which makes me love them even more!

For the cupcakes and the icing, I used Magnolia's recipe (the same as for my Spring cupcakes, you can find the recipe by clicking that link), which has to be my favourite cupcake recipe. They are simple, delicious, everybody loves them, and they are so easy to decorate any way you want!

This time I decided to go for a princess theme, so I chose cupcake wrappers with pink crowns on them, coloured the icing pink, and sprinkled a few silver-y ornaments on top... and to take the theme all the way, we have that adorable pink dish :)


So what is better than eating a delicious cupcake? Well, eating a delicious and good-looking cupcake!

Love,
Miss Diorista


Your feelings can change - but your memories probably won't. - Anonymous

Sunday, March 20, 2011

Spring is... almost here!

I'm feeling spring here!
I realized today that I hadn't baked cupcakes for ages - so of course, I had to set that straight :)
This is what I came up with - vanilla cupcakes with vanilla buttercream. I coloured the buttercream light green and decorated the cuppies with flower sprinkles. The cupcake cases are yellow. Believe me, those are summery to look at, but eating them just feels like summer! I'm ready for spring here...

I love that you can actually see the snow outside my kitchen window there... and here I am, talking about spring... I guess you can never be too positive :)

Since the recipe I used has been my go-to recipe for cupcakes the last few years, and it tastes amazing, I really want to share it with you. I originally found it online, and I believe it comes from the famous Magnolia bakery in New York (those are the cupcakes they eat on Sex and the City!)

Magnolia's Vanilla Cupcakes

*1.5 cups self-rising flour
*1.25 cups regular flour
*1 cup (2 sticks or 250 g) unsalted butter, softened
*2 cups sugar
*4 large eggs, at room temperature
*1 cup milk
*1 tsp vanilla extract
(makes 24 cupcakes)

Heat your over to 350°F or 180°C.
Line your cupcake tins with cupcake cases.
Blend together the two flours in a bowl and set aside.
In a big bowl, cream the butter (medium speed). Add the sugar slowly, and beat until light and fluffy (usually about 3 minutes).
Now add the eggs, one by one, and beat well in between.
Add the flour mixture, the milk and the vanilla extract in three parts each, alternating flour and milk (so: flour, milk, flour, milk, flour, milk). Beat well in between, but don't overdo it.
Fill the cupcake cases about 3/4 full, and bake for about 20-25 minutes.

Magnolia's Vanilla Buttercream

*1 cup (2 sticks or 250 g) unsalted butter, softened
*8 cups powdered sugar (I only use 6, which is more than enough)
*0.5 cup milk
*2 tsp vanilla extract
*Food dye (if wanted)
(more than enough to ice 24 cupcakes)

In a big bowl, beat together the butter, 4 cups of powdered sugar, the milk and the vanilla extract for about 3-5 minutes, using medium speed.
Add 1 cup of powdered sugar at a time, beating 2 minutes in between cups.
Add food dye (if wanted).

Now you can decorate your cupcakes, and believe me, the possibilities really are endless!
Hurry into your kitchens and start baking, folks ;)

Love,
Miss Diorista


I never say "Good Bye" because they seem like forever. I rather say "See you later". - Anonymous

Friday, February 11, 2011

Cinnamon Apples and your opinions, please!

How did you do this week? Been drinking much water? I love the great effect water has on my skin, so last week's challenge really helped with that!

This week's challenge: Walk the stairs! Your goal is to use the elevator as little as possible this week - it's a great way to sneak in a little cardio!

This week's recipe:
Cinnamon Apples
*Apples, as many as you think you will eat... I suggest one :)
*Powdered cinnamon - just enough to sprinkle over your apples!

Slice your apples and sprinkle the cinnamon over them - then microwave them for a few seconds (10 to 30 seconds, depending on your microwave). Then enjoy - it's a great dessert or snack!

And now, instead of an "article" from me, I want to hear your opinions - everything and anything health-related, post it in the comments, please!

Stay healthy,
Miss Diorista

Saturday, February 5, 2011

Breakfast Cookies, Water and Fibres!

I'm late with the Friday health post - again! Sorry about that, but I actually have a pretty good excuse: I was looking for the recipe that I wanted to share with you this week, which comes from the book Sneaky Chef by Missy Chase Lapine. That book teaches you how to sneak healthy food (veggies, fruits, fish, whole-grains, etc.) into your kids' food. However, I found that I actually like to fool myself with those recipes, and my favourite from the book is this one. Enjoy those healthy cookies!
 
Breakfast Cookies
 
* 2 cups whole grain cereal flakes (I use All-Bran)
* 3/4 cup Flour Blend (1/4 cup white flour, 1/4 cup whole wheat flour, and 1/4 cup wheat germ)
* 1/2 teaspoon baking soda
* 1/2 teaspoon salt
* 1 teaspoon cinnamon
* 1 large egg
* 1/2 cup brown sugar
* 1/4 cup canola oil (I usually use EVOO though)
* 2 teaspoons pure vanilla extract
* 3/4 cup low-fat ricotta cheese (I usually use low-fat yogurt instead)
* Cinnamon sugar for dusting (if wanted)
Preheat oven to 400 degrees and line a baking sheet with parchment paper (or spray with oil).
Using a rolling pin, gently crush the cereal (in a sealed plastic bag) into coarsely crushed flakes.
In a large mixing bowl, whisk together Flour Blend, crushed cereal, baking soda, salt and cinnamon. In another bowl, whisk together egg, sugar, oil, vanilla, and ricotta cheese. Add the dry ingredients to the wet and mix just enough to moisten dry ingredients. Drop single tablespoonfuls onto the baking sheets, leaving about an inch between cookies. Flatten cookies with the back of a fork and then sprinkle tops generously with cinnamon sugar (you can skip this if you don't like it). Bake about 18 to 20 minutes, or until nicely browned and crispy around the edges.
Makes 16 to 18 large cookies.

These make for the best, guilt-free breakfast ever!

This week's challenge: Drink 8-10 glasses of water, every day.
This doesn't sound like a big deal, but drinking enough water is so important, and most of us don't drink more than 5 glasses, which is way too little. And it's also really fun to count your glasses of water throughout the day - believe me! :)

And finally, a few word on fibres.

 Great reasons why you should incorporate more whole-grains into your diet!

* They can possibly reduce the risk of cancer and heart-disease.

* Fibres help reduce the "shock" your body gets from eating sugar - which leads to you not getting the "afternoon snack craving".

* Fibres aid your digestion.

* Fibres help keep you satisfied for longer.

That's it for this week, stay healthy, people!
Love, Miss Diorista

P.S. Picture from http://www.knowledgera-theworld.blogspot.com/
And I have absolutely no idea why half of my post looks bolded - it doesn't look that way in the blogger format... any of you had this problem?

Thursday, February 3, 2011

Some of my Favourite Books for Baking!

Since you know that I'm really into baking, I decided that maybe some of you would like to see my favourite baking books :) Enjoy!

This is where I keep my favourite baking and cooking books. I have more but those are my favourites and the ones that I use most often.

And here are those five favourites from the favourites shelf, that I will be showing you in the post :)

The first one is Hot Chocolate by Michael Turback. Obviously, this is not a baking book, but it had to be included. I never knew so many different kinds of hot chocolate there were, until I bought this book! Endless fun :)

Next up is one of my all-time favourites, How To Be a Domestic Goddess by Nigella Lawson. This is one of those baking books that I can actually read, not just bake from.

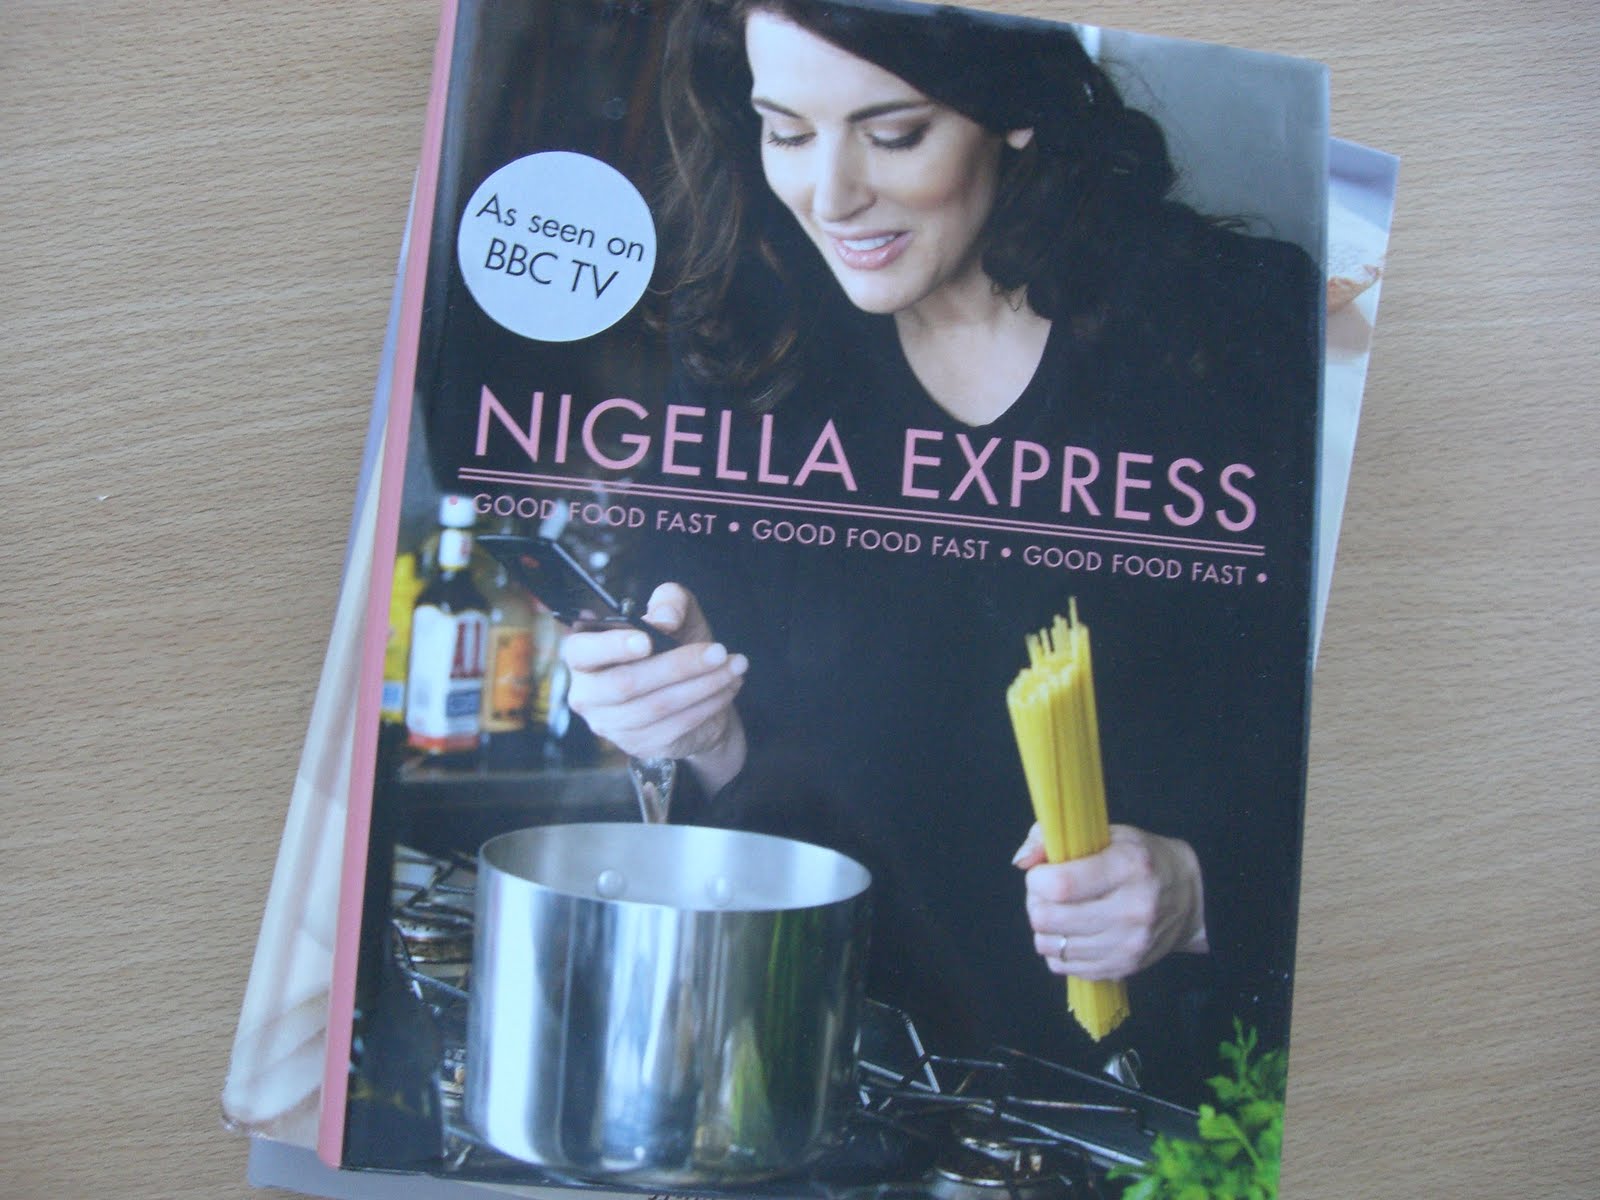
Nigella Express, by Nigella Lawson. This book has lovely recipes, and as the title describes, they're quick, too. And I love the beautiful pictures in it!
As you can see, I really love Nigella, her recipes and her shows... something about her is just so relaxing, and you can't possibly be down when you're cooking her recipes, they're too much fun for that!

My friend gave me Baking with love from Reader's Digest for my birthday... two years ago, I believe. I'm still discovering great recipes there, and I love how they try to keep things healthy (act as if you can't see those brownies on the cover... I'm not going to try to make you think they're healthy! ;)

And finally, my aunt gave me this one, Eric Kayser's Sweet and Savoury Tarts. I prefer the sweet ones, let me tell you right away :) This is a very elegant book, and you need to have some time on your hands before you dive into a recipe from there. They are completely worth the effort, though!
'
'
What are your favourite baking and cooking books? Please tell me in the comments!
'
Happy baking,
Miss Diorista

Saturday, January 29, 2011

Granola, sleep and weekend-eating!


This post is one day late - sorry about that :)

This week's challenge: Get 6 to 7 hours of sleep every night.
Ough, this one is going to be tough for me! I can easily get away with 4 hours of sleep... but I know it's not good for me. This week, I'm going to try to change my sleeping habits a bit... I'm not really picking the best week, though, it's going to be crazy, and I will be needing those extra few hours to get work done... but I'm going to try to think like Garfield... well, no, not really, then I wouldn't get any work done at all!
'
This week's recipe:
Granola (Bars) - slightly adapted from a recipe by Seventeen Magazine (they sometimes have surprisingly good recipes!)
'
*0.5 cup butter
*3/4 cup oats
*1 T semolina flour or cornmeal
*1/3 cup packed soft brown sugar
*Nuts and/or dried fruit, if you wish
'
Preheat your oven to 190°C or 375°F.
Mix together the dry ingredients, then pour melted butter over them and mix well. Press into a greased baking pan, about 11*7 inches, and bake for at least 15 minutes.
Now, you can either leave to set in the pan, and then cut into bars (about 12 pieces), or you can leave it to set, and then crumble it up for granola. I personally favour the latter option :)
'
I know this isn't terribly healthy, and you probably shouldn't be eating tons of this every day (butter and sugar are sadly not good for you... but oats are, however!), but every now and then, this is a great way of getting your fibre!
'
Now, I'm pretty sure that we all recognize the following situation: You've been eating healthy all week, then it's Friday... and all of your good intentions seem to fly out the window, never to be seen again. Here are a few tips for dealing with those weekends!
'
*Work out - the harder you work out, the less likely you will be to spoil your hard efforts!
'
*It's ok to indulge a little - If you constantly tell yourself that you can't have this or that, it will only make you want it more. Allow yourself a little splurge every now and then, and you won't be as likely to binge.
'
*Prepare healthy food before - If you already have sliced fruit and veggies, nuts or a vegetable soup just waiting to be heated, then you won't be as likely (I feel like "won't be as likely" is all I'm saying in this post...) to go and buy unhealthy food, or prepare them.
'
*When going to parties - Eat healthy a breakfast and lunch, but scale things back a little. And when you get to the party, keep your hands full! If you're holding a low-cal (preferably water) drink, you can't reach for more food so easily ;)
'
That's it for this week, hope you liked it and stay healthy!
'
Love,
Miss Diorista

Friday, January 21, 2011

Pancakes, Veggies and How to Get Better Sleep!

I can't believe how fast the past week flew by - I didn't get any posts up and all of a sudden it's Friday again... well, it's technically Saturday, but we'll call it a Friday, ok?
Sure ;)

This week's challenge!
Every day this week (and of course, keep going!), you are going to eat 2.5 cups of veggies.
I actually started this today, and it feels great. One cup is simply one cup, except with leafy veggies, like lettuce, but 1 cup of that counts as 0.5 cup, so 2 cups of lettuce count as 1 cup. Other than that, it's pretty simple!

This week's recipe:
Whole Grain Pancakes with Fruits!
*1 packet pancake mix, OR your favourite pancake recipe. (Remember to use whole grain flour if baking from scratch. To make your mix healthier: Add a bit of whole grain flour, then thin your batter with milk until it is the right consistency.
*Fresh fruits of your choice (I love strawberries and bananas for this!)
*Agave syrup, maple syrup or honey - just make sure it doesn't have anything added to it!
*Fruit spread, if you wish.

Now, simply bake your pancakes, spread some fruit spread on it if you feel like it, fill it with good-for-you sliced fruits, and drizzle a few drops of sweetness over the whole thing - yummy!
And this week's "bits of this and that": Sleep!
I know perfectly well that I should sleep 7 to 8 hours each night... yet somehow, I always end up getting way to little sleep... which is not good. Sleep is so important. Did you know, that once we get into a deep state of sleep, our brains start solving the problems we are dealing with? That is why it is somehow easier to make difficult decisions when you've slept well - your brain has been working on the answer while you were sleeping! So instead of worrying and staying up all night - just go to sleep!
Also, women who get five hours or less of sleep every night, are 32% more likely to gain weight than women who get 7 hours or more - that's a fact that wakes most of us up!
But what if you want to go to sleep... but just can't? We've all been there, just lying and staring at the ceiling... it's not fun. What can you do? Well, try those tips!

*Skip caffeine for at least 4 hours before you go to bed.

*Form your habits and rituals. Always doing the same things before you go to sleep can train your brain into falling asleep faster and more comfortably (the same things applies to your children!).

*Avoid distractions. Things like TVs and computers do not belong in your bedroom, especially not if you are having trouble sleeping.

*If you're stressed out during the day, that stress will stand in your way when you're trying to fall asleep later. Try doing yoga or relaxing breathing exercises during the day (lunchtime is perfect - you don't even have to leave your desk!). You will be more relaxed, which will definitely help you when it comes to sleeping.

*Not too chilly, not too warm. If your bedroom is too warm, you will probably encounter some problems falling asleep. However, make sure that your feet stay warm - it's very difficult to fall asleep when your feet are cold (scientifically proven!). Try some soft and cosy socks!

*Eat carbs! No, not a whole truckload. Sorry :) Just about a half cup of dry cereal, eaten about two hours before you go to bed, will help your brain release serotonin and tryptophan, which will aid when it comes to sleeping.


That's it for this week, I hope you all stay happy and well!
Yours, Miss Diorista

P.S. Please take a minute to vote on the poll, it would mean the world to me ;)

Friday, January 14, 2011

Vitamin D, Tortillas and "The Plank"!

It's Friday again!
How did the last week go for you all? Mine could have gone worse :) I managed to get 1.5 cup fruits a day almost the whole week, but now it's time for a new week, new challenge and a new recipe!

Challenge: The Plank
What you want to do, every day this week (if you're beginning exercising for the first time, or after a long break, you might want to choose every other day), is to get in this position here:
Keep your back straight and squeeze your abs! Stay up like that, on your elbows, for 30 seconds the first two days, then one minute the next three days, and for the last two days, you will try 90 seconds. It's harder than it seems ;) However, if you find this too easy or too hard, simply adjust the time to what you can handle - be careful not to overdo it!
'
Recipe of the week: Tortillas!
'
This is my favourite way of eating Mexican food - it's yummy, healthy and quick. Plus, you can adjust it to what you like. Enjoy ;)
*Whole Wheat Tortillas, as many as needed (about 1-3 per person)
*1 T olive oil
*500 g ground beef
*Mushrooms - I used about 15 of them
*A teeny tiny bit of butter
*Oregano (didn't measure, sorry! Just add little by little, you can always add but you can't take out!)
*Salt - just a little bit!
*Mexican spice blend, if you like
*Veggies of your choice - I love cucumbers and bell peppers for this
*Salsa Sauce
*Beans - any kind, I used pinto beans
'
Heat up the olive oil in a frying pan, and cook the beef. When slightly brown, add your spices, stir and cook until ready.
Chop your mushrooms, and fry them in the butter. Mix those in your beef.
Chop the veggies. You can cook those too, but I prefer them raw.
Now, it's time to put your dinner together :) There are a few ways for folding a tortilla, but I like to gather the filling in the middle (top picture). Then I fold two opposite sides of the tortilla over the filling:
And finally, I fold the other two sides.
It's really easy to hold the tortilla in your hands when you fold it this way.

Yummy!
'
And finally, a few words on Vitamin D:
'
Why do you need Vitamin D?
Vitamin D helps your body use calcium, which is hugely important for your bones. It also helps your heart muscle perform at its best, thus keeping your heart healthy.
'
Where do I get Vitamin D?
Well, Vitamin D isn't called "The Sunshine Vitamin" for nothing. One way of getting this vitamin into your system, is by exposing yourself to sunshine for a short time. However, you don't want too much sunshine because of risk of skin cancer, so you should make sure that you include food like eggs, oatmeal, milk, tuna and sweet potatoes in your diet. You can also take a supplement.
'
So, that's it for this week! Good luck with the challenge, and getting your vitamin D!
'
Yours,
Miss Diorista
'
P.S. The Plank picture is from http://www.runningintherealworld.worldpress.com/. Other pictures are my own (I know because I ate that tortilla myself - it tasted amazing!)

Friday, January 7, 2011

Getting started!

It's the first post of our journey towards better health in 2011! I'm so excited, and I really hope that you are going to be doing this with me - it's so much easier (not to mention way more fun!) to do it together!
In this post we will be discussing how to get started. But first of all, this week's challenge! Drumrolls, please...

Challenge: Eat at least 1.5 cup fruit every day!

One average fruit (1 apple, 1 orange, 1 pear, etc.) is one cup - but if dealing with for example berries or melons, simply fill up one cup. 0.5 cup of dried fruit equals one cup of fresh fruit, and if you like 100% fruit juice, then 8 ounces count as one cup.

Why is this good for me? Well, first of all, we all know that we should eat more fruits and veggies - for most of us, it is somehow easier to fit in the fruits, so that is why we are starting with that one. But when you look at the nutrients, then fruits are packed with good-for-you fibres (fibres help keep you full for longer) and vitamins. Last but not least, when you have to fit this into your diet, you won't have as much room left for the unhealthy stuff!

So of course, this week's recipe compliments the diet challenge. It's nothing too complicated, but I hope you like it. It's perfect for breakfast (I ate the one above for breakfast), since you get in a good load of fruit, calcium and whole grains!

Fruit Salad (for one person)
*About 1 to 1.5 cup of chopped-fruit. I like apples, strawberries, blueberries, bananas, plums and pears. Just use what you have, or use the opportunity to try out something new!
*3 T yogurt (preferably low in fat and sugar - and organic if you like)
*1 T granola - make sure you buy good stuff. Many brands of granola are not so healthy once you look closely!

Simply mix the fruits together in a bowl, put the yogurt on top, and sprinkle your granola over the whole thing. Don't forget to eat up ;)

A quick smoothie: Fruits can be a great snack on the go, and smoothies are a fab way to dress them up a bit. My favourite smoothie is simple: 1 cup blueberry yogurt and 1 chopped up, frozen banana. Mix together in a blender - it's so yummy!

Quick tip: If fruits are getting slightly too mushy for eating them plain (but are still ok), chop them up and put them in the freezer. They'll be great for smoothies!


So, then. We've covered the recipe and the challenge, now it's the rest:

Getting started!

The most important tip I can give you (although of course I am no expert!), is to take care not to go too fast. When we are beginning to make our lifestyles healthier, we sometimes get so excited that we go all out for one week - and then end up quitting because we're already burned out. Start slowly, not only in exercise but also with diet. For example, don't cut out all your sugar at once - you'll just get cranky and end up eating way more than you otherwise would have.

Also, a key factor for beginners is to have some good knowledge about where you're heading. You wouldn't sail across the Atlantic without a map, would you? So here are some of my favourite websites for information and support on healthy lifestyle:

Shape: A great website which gives you information on both diet and exercise.

Prevention: This one also covers diet and exercise :)

SparkPeople: A great website where you can keep track of all kinds of goals, as well your diet and exercise plan. They have a galore of exercises and a huge database of food for you to log. Find out how much you burn when you jog for an hour, read interesting articles and chat with people who have similar goals to yours.

SparkTeens: A version of SparkPeople, but designed to fit teenagers' needs. If you are younger, you might like this one better than the original.


I hope you check out those websites, they are all really great. Also, join the challenge! I will be updating you in the comments on how I will be doing, hope you will do the same!

Love, Miss Diorista

Monday, January 3, 2011

Chocolate Pudding Cookies!

I finally had the time to try out the Gingerbread Boy Mold that I got for Christmas (you can see my post about it here). I decided to make cookies, and bake them in the mold. Yum! They turned out to be so good, and well as so cute! Give them a try, this is my favourite cookie recipe so far!

Chocolate Pudding Cookies

150 g soft butter
200 g brown sugar
50 g white sugar
1 packet pudding mix - chocolate or caramel flavour
1 tsp vanilla extract
2 eggs
270 g flour (if using cocoa, use a bit less flour)
Cocoa, optional
1 tsp soda
150 g chocolate

Heat your oven up to 180°C or 360°F.
Mix together butter, both sugars, pudding mix and vanilla. Then add the eggs, one at a time, and stir in between.
Mix together flour, soda and cocoa (if using). Mix into the butter-mixture, slowly.
Chop the chocolate (you can use white or regular) and mix into the dough.
Form cookies with tablespoons (or make them into gingerbread boys!) and bake on a baking plate with baking paper on it. Bake for 10-14 minutes, less is more here, you want them chewy, ooey and gooey!

Oops... looks like somebody had an accident...

Love, Miss Diorista

Monday, December 27, 2010

Candy Cane Bark!

Again, something I didn't find the time to do before Christmas... candy cane bark! There is something so oddly comforting about cuddling up in a huge winter-y sweater on your couch, reading a book and eating a huge peace of candy cane bark. Anyone got the munchies? Read on!

Candy Cane Bark

200 gr chocolate (milk, dark... just pick your fave)
200 gr white chocolate
Crushed up candy canes (I used four of them)

First, melt the regular chocolate, and spread it out on a baking plate, covered with baking paper. Save about two, three teaspoons of the chocolate for later!

Melt the white chocolate, pour it over the regular chocolate. Blend out wiht a fork. You could stop right here, put it in the freezer/refrigerator, break it up into peaces and wrap it up, for a very elegant gift. But we will carry on!

Now, spread the crushed up candy canes over the chocolate. Afterwards, drizzle over all that goodness what is left of the regular chocolate.
Now, put your bark in the freezer/refrigerator (I prefer the refrigerator... maybe just because there is no space in my freezer :). Let it sit there for a few hours. When the bark is ready, you can break it up in peaces. So pretty... and so yummy! Enjoy ;)
Love, Miss Diorista

Sunday, December 26, 2010

Chocolate and licorice cookies!

I was super busy the last few days before Christmas, so I'm actually doing my Christmas baking now :) I really want to share this delicious recipe with you. It is very sugary, chocolatey and licorice-y... if that's a word! I made one batch, and half an hour later, it was gone. Needless to say, I quickly whipped up another batch - those are really quick to make, only about 30 minutes from the beginning to the end! Have fun baking :)

Chocolate and licorice cookies

3 egg whites
200 gr brown sugar
150 gr milk chocolate, chopped
300 gr shredded, chocolate coated licorice (Can't find it? Just chop some regular licorice)

Heat up your oven to 170°C or 340°F.

Whip together the egg whites and the brown sugar until light beige in colour and fluffy in texture. It should look something like this:


Now, remove your bowl from the mixer, and with a spatula (I got a red one for Christmas :), carefully fold in the licorice and the chocolate. Mix it as little as you can, you don't want to lose any of the air that you just whipped in the dough.


Doesn't it look yummy? When your dough is ready, place a sheet of parchment paper on a baking plate. Make cookies; about one heaped teaspoon makes one cookie - don't forget that those grow quite big in baking, so leave some space between them.

Bake for about 10 to 12 minutes for chewy cookies - longer if you want them crispy (I prefer them chewy :)

Enjoy!

Love, Miss Diorista

Sunday, July 18, 2010

Cookie Dough Brownies, yay!

How delicious do those look? Well, they taste every bit as good as they look, let me tell you! I got the recipe from Sunday Baker, and let's just get on with it! Run into your kitchen and start baking!


Cookie Dough Brownies

From Sunday Baker, but with slight changes of my own


1 recipe of brownies (from a box or from scratch, I just googled "brownie recipes")


3/4 cup soft butter

1/2 cup granulated sugar

1 cup brown sugar

1 - 2 t. vanilla

5 - 7 T milk

2 cups whole wheat flour

4 T unsweetened cocoa

1 cup chopped chocolate or chocolate chips

(you can add nuts if you want to)


1 and 1/2 cup chopped chocolate

1 - 2 T butter


Grease your 13x9" pan and bake your brownies.

To prepare the cookie dough, beat together butter and white sugar. Add brown sugar, vanilla and milk, mix well. Add flour and cocoa and mix. Stir in chocolate (and nuts, if using).

When the brownies have cooled down, spread the unbaked cookie dough on top of your brownies. Yum, you're almost done! Melt together the chocolate and butter, let cool down a bit, and then spread over the whole thing! Let this sit in the fridge (or freezer, if you're in a hurry) in the pan, and when it has set, slice. Then enjoy... lots.


Obviously, you can add anything into the cookie dough. I'm seeing tons of candy here... *passed out from too much sugar*!


My best regards,

Miss Diorista

Wednesday, July 7, 2010

Chocolate Sunflower Cupcakes


Even though it is July, here it is not really sunny... the wind has been blowing like crazy and I decided to simply spend the evening baking. So this is what came out of it: Chocolate Sunflower Cupcakes! They were easy and simple to make, and so was the icing. The only time-consuming part is the sunflower. I had them on hand (made them about a week ago when baking for my aunt's "party"), you could skip them if you're in a hurry. Or use sprinkles... or make them! They are simple too, just take a bit of time.
Line a sheet of parchment paper to pipe on. Simply melt some good quality white chocolate, colour it with food colouring, and fill a piping bag with it, using a small round nozzle (I believe I used Wilton's nr. 2... don't quote me on that, though!). Pipe the outlines of a sunflower. This takes a bit of practice, but it is not that hard. You can do it ;) Let the outlines set and harden. Then, take a bit bigger piping nozzle (I believe Wilton's nr. 3... but again, no quoting!), and gently flood the leaves of the sunflower. Be careful not to overflood. When set, you use a small piping nozzle (Wilton's nr.2... no quoting, lol!) to pipe a little dot of melted brown chocolate in the middle of each sunflower. Let set and then gently, very gently, remove from the parchment paper. There you go!


Chocolate Sunflower Cupcakes
Adapted from Baking Bites. Some slight changes were made.

1 cup all purpose flour
1 cup wholewheat flour
2 cups sugar
1 tsp. baking soda
1 tsp. baking powder
1/2 tsp. salt
1/2 cup vegetable oil
2 eggs
2 tsp. vanilla
1 cup sour cream (I used 5% fat)
1 cup coffee (room temperature)
1/2 cup finely chopped chocolate (or small chocolate chips)

Preheat your oven to 350°F (180°C).
Mix all the dry ingredients together in one bowl. Mix the chopped chocolate in.
Mix the wet ingredients together in another bowl, and beat a bit. Gently, mix the wet and dry together. Make sure everything is well blended, no lumps! Don't overblend, though.
Line about 18 muffin cups with muffin liners, and fill them ca. 3/4 full.
Bake for about 15 to 18 min. (I had to bake them a little longer, just watch them carefully.)

Chocolate Icing
My own recipe

1 cup unsalted butter
1 cup chopped 70% chocolate, melted
3 tbls. coffee (room temperature)
3 tbls. cream, if needed to thin the icing.
About 3 cups powdered sugar (just as much as you need, I didn't really measure...)

Cream the butter, then mix in the melted chocolate. Mix in the coffee, than the powdered sugar. If you need to thin it, use the cream, otherwise, skip it.
Ice the cupcakes when they have cooled, garnish if you want, and enjoy! (My family and I sure enjoyed!)


If you make these, let me know what you think! And if you need further information on the flower-making, just comment and I'll get right back to you!
My... chocolatey regards,
Miss Diorista

Monday, July 5, 2010

White Chip Chocolate Cookies


These are completely dangerous... those still working on the art of self-control are advised to stay far, far away. You have been warned.
I love shopping, but I have to admit that some things are more fun to buy than others. Obviously, makeup is always fun. Clothes and shoes, too. All kinds of dishes, cups and kitchen tools are another addiction of mine, along with books on recipes, especially for baked goods. One would think that nothing special would tempt me in the supermarket... but one would be wrong! Whenever I see something that I think would be fun to bake with - be it a new brand of chocolate, some kind of candy, or simply anything that catches my baking-eye, I have to get it!
So the other day, I bought a bag of white chocolate morsels by Nestlé. They were quite tasty and my cookies turned out great. I was about to throw the empty bag away when I noticed two recipes on the back of it... Of course, the oven was quickly turned on again!
I made some slight changes to the recipe, but oh my! This is heaven, I tell you!
So here we go...
'
'
White Chip Chocolate Cookies
(Adapted from Nestlé's recipe)
'
1 1/4 cup whole-wheat flour
1 cup rolled oats
1 package pudding mix (I used one with chocolate flavour)
1/3 unsweetened cocoa
1 tsp. baking soda
1/4 tsp. salt
1 cup unsalted butter, softened
3/4 cup granulated sugar
2/3 cup packed brown sugar
1 tsp. vanilla extract
2 large eggs
1 cup chopped chocolate (around 50-60% cocoa is fine)
1/2 cup chopped white chocolate
1/2 cup mint filled chocolate
'
Preheat oven to 350°F (or 180°C).
Combine flour, oats, pudding mix, cocoa, soda and salt in a bowl.
In another bowl, beat together butter and both sugars until creamy. Add eggs, one at a time and beat well in between. Gradually mix in the dry ingredients. Stir all the chocolate in.
Roll into balls (I use really heaped teaspoons - these grow big in the oven!), place on baking paper and press them down a little with wet fingers or the back of a spoon.
Bake for 9 to 11 minutes, cool and enjoy!
'
Cheers,
Miss Diorista
'
P.S. Sorry about the little commas in thist post! The spaces were teasing me!
Related Posts Plugin for WordPress, Blogger...